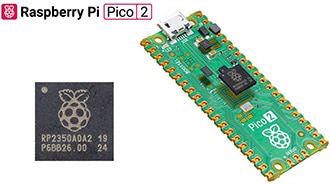
Mfr Part # SC0918
RASPBERRY PI PICO W RP2040
Raspberry Pi
License: See Original Project Bluetooth / BLE Arduino Raspberry Pi SBC
Guide by John Park
Wireless keyboards. What a concept! I've got a few of them and they are usually designed to work over either Bluetooth Classic or Bluetooth Low Energy (BLE). Not every computer or microcontroller can connect with them, but a Pico W or Pico 2 W can, and just costs a few dollars...
And that very same Pico can bridge the wireless keyboard messages via USB HID to a host computer or microcontroller. This way, any computer or device with USB keyboard support can now connect to a Bluetooth Wireless keyboard, without needing BT support. Instant wireless bridge!
This guide will show you how to build a versatile, cheap, small keyboard bridge for all the Blueteeth!
Parts
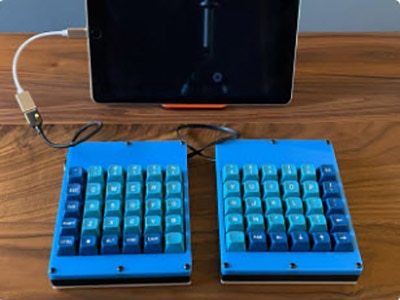
Bluetooth Classic Keyboard
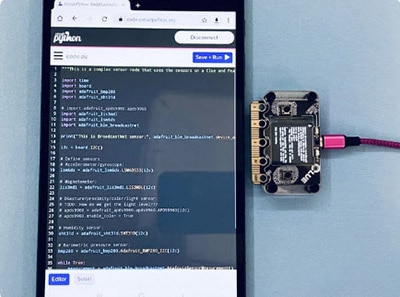
BLE Keyboard
You can opt for the easy drag-and-drop method to get the Bluetooth Bridge code onto your Pico W / 2W. No IDE required.
First, download the UF2 for your board from the link below (you can use the Pico 2W UF2 on a Pimoroni Pico Plus 2 W as well as the Raspberry Pi Pico 2W).
Start with your Pico unplugged from USB. Hold down the BOOTSEL button, and while continuing to hold it (don't let go!), plug the Pico into USB to your computer. Continue to hold the BOOTSEL button until the RPI-RP2 or RP2350 drive appears in your computer's File Explorer or Finder.
If the drive does not appear, unplug your Pico and go through the above process again.
A lot of people end up using charge-only USB cables and it is very frustrating! So, make sure you have a USB cable you know is good for data sync.
Drag the UF2 file for your board onto the RPI-RP2 or RP2350 drive icon. The file will copy and then the drive will self-eject and restart the board.
If you want to customize the code, download the package linked below and then set up the Philhower RP2040/RP2350 core in Arduino as shown on the next pages of this guide.
// SPDX-FileCopyrightText: 2025 John Park for Adafruit Industries
//
// SPDX-License-Identifier: MIT
//
// made with assistance from Claude Sonnet 4
//
// Unified Bluetooth HID Bridge - BT Classic & BLE
// put keyboard in pairing mode, then press reset or BOOT button
// slow blinks mean scanning
// fast blinks mean keyboard detected, press a keyboard key to connect

// === CONFIGURATION ===
#define DEBUG_MODE false   // Set to false to reduce serial output
#define BLINK_MODE true    // Set to false for solid LED (no keypress blinks)
#define SCAN_MODE "Both"   // Options: "BT_Classic", "BLE", "Both"

// Include both Bluetooth stacks
extern "C" {
#include "btstack.h"
}
#include <BluetoothHCI.h>
#include <BluetoothHIDMaster.h>
#include <Keyboard.h>
#include <Mouse.h>

// Connection state management
typedef enum {
    INIT,
    SCANNING_CLASSIC,
    CLASSIC_CONNECTING,
    CLASSIC_CONNECTED,
    SCANNING_BLE,
    BLE_CONNECTED,
    BOTH_FAILED,
    DISCONNECTED
} connection_state_t;

connection_state_t connection_state = INIT;

// BT Classic components
BluetoothHCI hci;
bd_addr_t target_keyboard_addr;
bool target_keyboard_found = false;
uint16_t hid_control_cid = 0;
uint16_t hid_interrupt_cid = 0;
static btstack_packet_callback_registration_t hci_event_callback_registration;

// BLE components
BluetoothHIDMaster ble_hid;
HIDKeyStream keystream;

// Shared state tracking
static uint8_t last_modifiers = 0;
static uint8_t last_keys[6] = {0};
bool keyPressed[256] = {0}; // Track which keys are currently pressed

// LED management
unsigned long ledTimer = 0;
bool ledState = false;
unsigned long ledOffTime = 0;
bool ledBlinking = false;
int pairingBlinks = 0;
unsigned long pairingBlinkTimer = 0;

// Timing management
unsigned long lastScan = 0;
unsigned long stateStartTime = 0;
const unsigned long CLASSIC_SCAN_TIMEOUT = 10000; // 10 seconds
const unsigned long BLE_SCAN_TIMEOUT = 15000;     // 15 seconds

void setup() {
  Serial.begin(115200);
  delay(3000);

  Serial.println("=== UNIFIED BLUETOOTH HID BRIDGE ===");
  Serial.printf("Scan mode: %s\n", SCAN_MODE);
  Serial.println("Put your Bluetooth device in pairing mode now");

  // Initialize LED
  pinMode(LED_BUILTIN, OUTPUT);
  digitalWrite(LED_BUILTIN, LOW);
  Serial.println("LED initialized");

  // Initialize USB HID
  Keyboard.begin();
  Mouse.begin();
  Serial.println("USB HID initialized");

  // Start with LED blinking to show we're alive
  ledTimer = millis();
  ledState = true;
  digitalWrite(LED_BUILTIN, HIGH);

  Serial.println("Starting Bluetooth stack initialization...");

  // Choose scan mode based on user setting
  if (strcmp(SCAN_MODE, "BT_Classic") == 0) {
    Serial.println("BT Classic only mode");
    connection_state = SCANNING_CLASSIC;
    stateStartTime = millis();
    initAndScanClassic();
  } else if (strcmp(SCAN_MODE, "BLE") == 0) {
    Serial.println("BLE only mode");
    connection_state = SCANNING_BLE;
    stateStartTime = millis();
    initAndScanBLE();
  } else {
    Serial.println("Both protocols mode - trying Classic first");
    connection_state = SCANNING_CLASSIC;
    stateStartTime = millis();
    initAndScanClassic();
  }
}

void initAndScanClassic() {
  Serial.println("\n=== INITIALIZING BT CLASSIC STACK ===");

  // Initialize HCI for Classic
  l2cap_init();
  sm_init();
  gap_set_default_link_policy_settings(LM_LINK_POLICY_ENABLE_SNIFF_MODE | LM_LINK_POLICY_ENABLE_ROLE_SWITCH);
  hci_set_master_slave_policy(HCI_ROLE_MASTER);
  hci_set_inquiry_mode(INQUIRY_MODE_RSSI_AND_EIR);

  Serial.println("BTStack components initialized");

  hci.install();
  hci.begin();
  Serial.println("HCI installed and started");

  // Register BTStack event handler
  hci_event_callback_registration.callback = &classic_packet_handler;
  hci_add_event_handler(&hci_event_callback_registration);
  Serial.println("Event handler registered");

  // Turn on Bluetooth
  hci_power_control(HCI_POWER_ON);
  Serial.println("Bluetooth power ON");

  delay(2000); // Give it time to initialize

  Serial.println("Starting BT Classic device scan...");
  scanForClassicDevices();
}

void scanForClassicDevices() {
  Serial.println("Scanning for BT Classic devices...");

  auto devices = hci.scan(BluetoothHCI::any_cod);

  Serial.printf("Classic scan completed. Found %d devices:\n", devices.size());

  if (devices.size() == 0) {
    Serial.println("No Classic devices found. Will try BLE after timeout.");
    return;
  }

  Serial.println("Address           | RSSI | Class    | Name");
  Serial.println("------------------|------|----------|------------------");

  for (auto device : devices) {
    uint32_t cod = device.deviceClass();
    uint8_t majorClass = (cod >> 8) & 0x1F;
    uint8_t minorClass = (cod >> 2) & 0x3F;

    Serial.printf("%s | %4d | %08lx | %s",
                 device.addressString(), device.rssi(), cod, device.name());

    // Look for HID keyboards in Classic scan
    if (majorClass == 5 && (minorClass & 0x10)) {  // HID Keyboard
      Serial.print(" [HID KEYBOARD] *** CONNECTING ***");

      // We found a Classic keyboard!
      const char* addrStr = device.addressString();
      sscanf(addrStr, "%hhx:%hhx:%hhx:%hhx:%hhx:%hhx",
             &target_keyboard_addr[0], &target_keyboard_addr[1], &target_keyboard_addr[2],
             &target_keyboard_addr[3], &target_keyboard_addr[4], &target_keyboard_addr[5]);
      target_keyboard_found = true;

      Serial.printf("\nFound Classic HID keyboard: %s\n", device.name());
      Serial.printf("Address: %s\n", device.addressString());

      // Start Classic connection
      connection_state = CLASSIC_CONNECTING;
      stateStartTime = millis();
      startClassicConnection();

      Serial.println();
      return; // Exit the loop - we found our keyboard
    } else {
      // Show device type for debugging
      switch (majorClass) {
        case 1: Serial.print(" [Computer]"); break;
        case 2: Serial.print(" [Phone]"); break;
        case 3: Serial.print(" [Network]"); break;
        case 4: Serial.print(" [Audio/Video]"); break;
        case 5: Serial.print(" [HID Device]"); break;
        default: Serial.printf(" [Class:%d]", majorClass); break;
      }
    }
    Serial.println();
  }

  Serial.println("No HID keyboards found in Classic scan.");
}

void fallbackToBLE() {
  Serial.println("\n=== FALLING BACK TO BLE ===");
  connection_state = SCANNING_BLE;
  stateStartTime = millis();
  initAndScanBLE();
}

void initAndScanBLE() {
  Serial.println("Initializing BLE stack...");

  // Setup the HID key to ASCII conversion
  keystream.begin();
  Serial.println("KeyStream initialized");

  // Setup BLE callbacks
  setupBLECallbacks();
  Serial.println("BLE callbacks configured");

  // Start BLE HID master
  ble_hid.begin(true);
  Serial.println("BLE HID master started");

  // Start BLE connection attempt
  ble_hid.connectBLE();
  Serial.println("BLE connection initiated - waiting for device...");
  Serial.println("(BLE devices will be detected on first keypress)");
}

void setupBLECallbacks() {
  // BLE Mouse callbacks
  ble_hid.onMouseMove([](void *cbdata, int dx, int dy, int dw) {
    (void) cbdata;
    if (DEBUG_MODE) {
      Serial.printf("BLE Mouse: X:%d  Y:%d  Wheel:%d\n", dx, dy, dw);
    }
    Mouse.move(dx, dy);
    if (dw != 0) Mouse.move(0, 0, dw);
    blinkOnActivity();
  });

  ble_hid.onMouseButton([](void *cbdata, int butt, bool down) {
    (void) cbdata;
    if (DEBUG_MODE) {
      Serial.printf("BLE Mouse: Button %d %s\n", butt, down ? "DOWN" : "UP");
    }
    if (down) {
      if (butt == 1) Mouse.press(MOUSE_LEFT);
      else if (butt == 2) Mouse.press(MOUSE_RIGHT);
      else if (butt == 3) Mouse.press(MOUSE_MIDDLE);
    } else {
      if (butt == 1) Mouse.release(MOUSE_LEFT);
      else if (butt == 2) Mouse.release(MOUSE_RIGHT);
      else if (butt == 3) Mouse.release(MOUSE_MIDDLE);
    }
    blinkOnActivity();
  });

  // BLE Keyboard callbacks
  ble_hid.onKeyDown([](void *cbdata, int key) {
    handleBLEKey(key, true);
  }, (void *)true);

  ble_hid.onKeyUp([](void *cbdata, int key) {
    handleBLEKey(key, false);
  }, (void *)false);
}

void startClassicConnection() {
  if (!target_keyboard_found) {
    Serial.println("ERROR: No Classic target keyboard found");
    fallbackToBLE();
    return;
  }

  Serial.println("=== STARTING CLASSIC HID CONNECTION ===");
  Serial.println("Creating L2CAP Control channel...");

  // Create control channel first
  l2cap_create_channel(&classic_packet_handler, target_keyboard_addr, BLUETOOTH_PSM_HID_CONTROL,
                       48, &hid_control_cid);
}

void handleBLEKey(int key, bool state) {
  if (DEBUG_MODE) {
    Serial.printf("BLE Keyboard: %02x %s\n", key, state ? "DOWN" : "UP");
  }

  if (key >= 256) return; // Bounds check

  // Check if this is the first BLE key press (connection detection)
  if (connection_state == SCANNING_BLE) {
    Serial.printf("\n*** BLE KEYBOARD DETECTED ON FIRST KEYPRESS ***\n");
    Serial.printf("=== BLE DEVICE CONNECTED ===\n");
    Serial.printf("Ready to forward BLE input to USB.\n");
    Serial.printf("========================\n");

    connection_state = BLE_CONNECTED;
    celebrationBlinks(8); // 4 blinks for BLE

    // After celebration, LED will go solid (handled in LED patterns)
  }

  // Forward the key to USB
  forwardBLEKeyToUSB(key, state);
  blinkOnActivity();
}

void classic_packet_handler(uint8_t packet_type, uint16_t channel, uint8_t *packet, uint16_t size) {
  UNUSED(size);

  if (packet_type == HCI_EVENT_PACKET) {
    uint8_t event = hci_event_packet_get_type(packet);

    switch (event) {
      case BTSTACK_EVENT_STATE:
        if (btstack_event_state_get_state(packet) == HCI_STATE_WORKING) {
          Serial.println("Classic BTstack ready");
        }
        break;

      case L2CAP_EVENT_CHANNEL_OPENED:
        {
          uint16_t cid = l2cap_event_channel_opened_get_local_cid(packet);
          uint16_t psm = l2cap_event_channel_opened_get_psm(packet);
          uint8_t status = l2cap_event_channel_opened_get_status(packet);

          if (status) {
            Serial.printf("Classic L2CAP connection failed, status 0x%02x\n", status);
            handleClassicConnectionError(status);
            return;
          }

          Serial.printf("Classic L2CAP channel opened: CID=0x%04x, PSM=0x%04x\n", cid, psm);

          if (psm == BLUETOOTH_PSM_HID_CONTROL) {
            hid_control_cid = cid;
            Serial.println("Classic HID Control channel established");
            Serial.println("Creating L2CAP Interrupt channel...");

            // Create interrupt channel
            l2cap_create_channel(&classic_packet_handler, target_keyboard_addr, BLUETOOTH_PSM_HID_INTERRUPT,
                                48, &hid_interrupt_cid);
          } else if (psm == BLUETOOTH_PSM_HID_INTERRUPT) {
            hid_interrupt_cid = cid;
            Serial.println("Classic HID Interrupt channel established");
            Serial.println("*** CLASSIC HID CONNECTION COMPLETE ***");
            connection_state = CLASSIC_CONNECTED;

            celebrationBlinks(6); // 3 blinks for Classic

            // After celebration, LED will go solid (handled in LED patterns)
          }
        }
        break;

      case L2CAP_EVENT_CHANNEL_CLOSED:
        {
          uint16_t cid = l2cap_event_channel_closed_get_local_cid(packet);
          Serial.printf("Classic L2CAP channel closed: CID=0x%04x\n", cid);

          if (cid == hid_control_cid) {
            hid_control_cid = 0;
          } else if (cid == hid_interrupt_cid) {
            hid_interrupt_cid = 0;
          }

          if (hid_control_cid == 0 && hid_interrupt_cid == 0) {
            Serial.println("Classic HID connection lost.");
            connection_state = DISCONNECTED;
            target_keyboard_found = false;
          }
        }
        break;

      default:
        break;
    }
  } else if (packet_type == L2CAP_DATA_PACKET) {
    // Classic HID input data
    if (channel == hid_interrupt_cid) {
      if (DEBUG_MODE) {
        Serial.printf("Classic HID Input Data (%d bytes): ", size);
        for (int i = 0; i < size; i++) {
          Serial.printf("%02X ", packet[i]);
        }
        Serial.println();
      }

      processClassicHIDReport(packet, size);
    }
  }
}

void handleClassicConnectionError(uint8_t status) {
  Serial.printf("Classic connection failed with status 0x%02x - ", status);
  switch (status) {
    case 0x04: Serial.println("Page timeout"); break;
    case 0x05: Serial.println("Authentication failure"); break;
    case 0x08: Serial.println("Connection timeout"); break;
    default: Serial.printf("Error code 0x%02x\n", status); break;
  }

  Serial.println("Trying BLE fallback...");
  fallbackToBLE();
}

void processClassicHIDReport(uint8_t *report, uint16_t length) {
  if (length < 10) {
    Serial.printf("Invalid Classic HID report length: %d\n", length);
    return;
  }

  uint8_t modifiers = report[2];
  uint8_t *keys = &report[4];

  // Forward to USB HID
  forwardClassicToUSB(modifiers, keys);
  blinkOnActivity();
}

// Shared key mapping function
uint8_t hidToUsbKey(uint8_t hidKey) {
  switch (hidKey) {
    // Letters
    case 0x04: return 'a';    case 0x05: return 'b';    case 0x06: return 'c';    case 0x07: return 'd';
    case 0x08: return 'e';    case 0x09: return 'f';    case 0x0A: return 'g';    case 0x0B: return 'h';
    case 0x0C: return 'i';    case 0x0D: return 'j';    case 0x0E: return 'k';    case 0x0F: return 'l';
    case 0x10: return 'm';    case 0x11: return 'n';    case 0x12: return 'o';    case 0x13: return 'p';
    case 0x14: return 'q';    case 0x15: return 'r';    case 0x16: return 's';    case 0x17: return 't';
    case 0x18: return 'u';    case 0x19: return 'v';    case 0x1A: return 'w';    case 0x1B: return 'x';
    case 0x1C: return 'y';    case 0x1D: return 'z';

    // Numbers
    case 0x1E: return '1';    case 0x1F: return '2';    case 0x20: return '3';    case 0x21: return '4';
    case 0x22: return '5';    case 0x23: return '6';    case 0x24: return '7';    case 0x25: return '8';
    case 0x26: return '9';    case 0x27: return '0';

    // Special keys
    case 0x28: return KEY_RETURN;        case 0x29: return KEY_ESC;
    case 0x2A: return KEY_BACKSPACE;     case 0x2B: return KEY_TAB;
    case 0x2C: return ' ';               case 0x39: return KEY_CAPS_LOCK;

    // Symbols
    case 0x2D: return '-';    case 0x2E: return '=';    case 0x2F: return '[';    case 0x30: return ']';
    case 0x31: return '\\';   case 0x33: return ';';    case 0x34: return '\'';   case 0x35: return '`';
    case 0x36: return ',';    case 0x37: return '.';    case 0x38: return '/';

    // Function keys
    case 0x3A: return KEY_F1;     case 0x3B: return KEY_F2;     case 0x3C: return KEY_F3;
    case 0x3D: return KEY_F4;     case 0x3E: return KEY_F5;     case 0x3F: return KEY_F6;
    case 0x40: return KEY_F7;     case 0x41: return KEY_F8;     case 0x42: return KEY_F9;
    case 0x43: return KEY_F10;    case 0x44: return KEY_F11;    case 0x45: return KEY_F12;

    // Arrow keys
    case 0x4F: return KEY_RIGHT_ARROW;   case 0x50: return KEY_LEFT_ARROW;
    case 0x51: return KEY_DOWN_ARROW;    case 0x52: return KEY_UP_ARROW;

    // Navigation
    case 0x49: return KEY_INSERT;        case 0x4A: return KEY_HOME;
    case 0x4B: return KEY_PAGE_UP;       case 0x4C: return KEY_DELETE;
    case 0x4D: return KEY_END;           case 0x4E: return KEY_PAGE_DOWN;

    // Modifiers
    case 0xE0: return KEY_LEFT_CTRL;     case 0xE1: return KEY_LEFT_SHIFT;
    case 0xE2: return KEY_LEFT_ALT;      case 0xE3: return KEY_LEFT_GUI;
    case 0xE4: return KEY_RIGHT_CTRL;    case 0xE5: return KEY_RIGHT_SHIFT;
    case 0xE6: return KEY_RIGHT_ALT;     case 0xE7: return KEY_RIGHT_GUI;

    default: return 0;
  }
}

void forwardClassicToUSB(uint8_t modifiers, uint8_t *keys) {
  // Handle modifier changes
  uint8_t modifier_changes = modifiers ^ last_modifiers;

  // Process each modifier bit
  if (modifier_changes & 0x01) (modifiers & 0x01) ? Keyboard.press(KEY_LEFT_CTRL) : Keyboard.release(KEY_LEFT_CTRL);
  if (modifier_changes & 0x02) (modifiers & 0x02) ? Keyboard.press(KEY_LEFT_SHIFT) : Keyboard.release(KEY_LEFT_SHIFT);
  if (modifier_changes & 0x04) (modifiers & 0x04) ? Keyboard.press(KEY_LEFT_ALT) : Keyboard.release(KEY_LEFT_ALT);
  if (modifier_changes & 0x08) (modifiers & 0x08) ? Keyboard.press(KEY_LEFT_GUI) : Keyboard.release(KEY_LEFT_GUI);
  if (modifier_changes & 0x10) (modifiers & 0x10) ? Keyboard.press(KEY_RIGHT_CTRL) : Keyboard.release(KEY_RIGHT_CTRL);
  if (modifier_changes & 0x20) (modifiers & 0x20) ? Keyboard.press(KEY_RIGHT_SHIFT) : Keyboard.release(KEY_RIGHT_SHIFT);
  if (modifier_changes & 0x40) (modifiers & 0x40) ? Keyboard.press(KEY_RIGHT_ALT) : Keyboard.release(KEY_RIGHT_ALT);
  if (modifier_changes & 0x80) (modifiers & 0x80) ? Keyboard.press(KEY_RIGHT_GUI) : Keyboard.release(KEY_RIGHT_GUI);

  // Handle key releases
  for (int i = 0; i < 6; i++) {
    if (last_keys[i] != 0) {
      bool still_pressed = false;
      for (int j = 0; j < 6; j++) {
        if (keys[j] == last_keys[i]) {
          still_pressed = true;
          break;
        }
      }
      if (!still_pressed) {
        uint8_t usb_key = hidToUsbKey(last_keys[i]);
        if (usb_key != 0) Keyboard.release(usb_key);
      }
    }
  }

  // Handle key presses
  for (int i = 0; i < 6; i++) {
    if (keys[i] != 0) {
      bool already_pressed = false;
      for (int j = 0; j < 6; j++) {
        if (last_keys[j] == keys[i]) {
          already_pressed = true;
          break;
        }
      }
      if (!already_pressed) {
        uint8_t usb_key = hidToUsbKey(keys[i]);
        if (usb_key != 0) Keyboard.press(usb_key);
      }
    }
  }

  // Save current state
  last_modifiers = modifiers;
  memcpy(last_keys, keys, 6);
}

void forwardBLEKeyToUSB(int key, bool state) {
  if (key >= 256) return;

  bool isModifier = (key >= 0xE0 && key <= 0xE7);

  if (isModifier) {
    uint8_t usbKey = hidToUsbKey(key);
    if (state) Keyboard.press(usbKey);
    else Keyboard.release(usbKey);
    return;
  }

  // Handle regular keys
  uint8_t usbKey = hidToUsbKey(key);
  if (usbKey != 0) {
    if (state && !keyPressed[key]) {
      keyPressed[key] = true;
      Keyboard.press(usbKey);
    } else if (!state && keyPressed[key]) {
      keyPressed[key] = false;
      Keyboard.release(usbKey);
    }
  }
}

void celebrationBlinks(int count) {
  pairingBlinks = count;
  pairingBlinkTimer = millis();
  digitalWrite(LED_BUILTIN, HIGH);
}

void blinkOnActivity() {
  if (BLINK_MODE && pairingBlinks == 0 && (connection_state == CLASSIC_CONNECTED || connection_state == BLE_CONNECTED)) {
    digitalWrite(LED_BUILTIN, LOW);  // Turn OFF briefly to show activity
    ledBlinking = true;
    ledOffTime = millis() + 50;      // Stay off for 50ms
  }
}

void loop() {
  unsigned long currentTime = millis();

  // Handle state timeouts
  handleStateTimeouts(currentTime);

  // Handle LED patterns
  handleLEDPatterns(currentTime);

  // Handle BOOTSEL button
  handleBootselButton();

  delay(10);
}

void handleStateTimeouts(unsigned long currentTime) {
  switch (connection_state) {
    case SCANNING_CLASSIC:
      if (currentTime - stateStartTime > CLASSIC_SCAN_TIMEOUT) {
        if (strcmp(SCAN_MODE, "BT_Classic") == 0) {
          Serial.println("Classic scan timeout - BT Classic only mode, retrying...");
          stateStartTime = currentTime;
          scanForClassicDevices(); // Retry Classic scan
        } else {
          Serial.println("Classic scan timeout - falling back to BLE");
          fallbackToBLE();
        }
      }
      break;

    case SCANNING_BLE:
      if (currentTime - stateStartTime > BLE_SCAN_TIMEOUT) {
        if (strcmp(SCAN_MODE, "BLE") == 0) {
          Serial.println("BLE scan timeout - BLE only mode, retrying...");
          stateStartTime = currentTime;
          initAndScanBLE(); // Retry BLE scan
        } else {
          Serial.println("BLE scan timeout - restarting from Classic");
          connection_state = BOTH_FAILED;
          stateStartTime = currentTime;
        }
      }
      break;

    case BOTH_FAILED:
      if (currentTime - stateStartTime > 5000) { // Wait 5 seconds before retry
        Serial.println("Retrying scan sequence...");
        connection_state = SCANNING_CLASSIC;
        stateStartTime = currentTime;
        initAndScanClassic();
      }
      break;
  }
}

void handleLEDPatterns(unsigned long currentTime) {
  // Handle pairing celebration blinks first
  if (pairingBlinks > 0) {
    if (currentTime - pairingBlinkTimer >= 150) {
      pairingBlinks--;
      bool state = (pairingBlinks % 2 == 0);
      digitalWrite(LED_BUILTIN, state);
      pairingBlinkTimer = currentTime;
    }
    return;
  }

  // Handle activity blinks
  if (ledBlinking && currentTime >= ledOffTime) {
    digitalWrite(LED_BUILTIN, HIGH); // Turn back ON after brief off period
    ledBlinking = false;
    return;
  }

  // Handle state-based LED patterns
  switch (connection_state) {
    case SCANNING_CLASSIC:
    case SCANNING_BLE:
      // Slow blink while scanning (1 second cycle)
      if (currentTime - ledTimer >= 1000) {
        ledState = !ledState;
        digitalWrite(LED_BUILTIN, ledState);
        ledTimer = currentTime;
      }
      break;

    case CLASSIC_CONNECTING:
      // Fast blink while connecting - tells user to press a key
      if (currentTime - ledTimer >= 250) {
        ledState = !ledState;
        digitalWrite(LED_BUILTIN, ledState);
        ledTimer = currentTime;
      }
      break;

    case CLASSIC_CONNECTED:
    case BLE_CONNECTED:
      // Solid ON while connected (unless doing activity blinks)
      if (!ledBlinking) {
        digitalWrite(LED_BUILTIN, HIGH);
      }
      break;

    case BOTH_FAILED:
    case DISCONNECTED:
      // Very slow pulse when failed/disconnected (2 second cycle)
      if (currentTime - ledTimer >= 2000) {
        ledState = !ledState;
        digitalWrite(LED_BUILTIN, ledState);
        ledTimer = currentTime;
      }
      break;
  }
}

void handleBootselButton() {
  if (BOOTSEL) {
    while (BOOTSEL) delay(1);

    Serial.println("\nBOOTSEL pressed - restarting scan sequence");

    // Clean up current connections
    if (connection_state == CLASSIC_CONNECTED) {
      if (hid_control_cid) l2cap_disconnect(hid_control_cid);
      if (hid_interrupt_cid) l2cap_disconnect(hid_interrupt_cid);
    } else if (connection_state == BLE_CONNECTED) {
      ble_hid.disconnect();
      ble_hid.clearPairing();
    }

    // Reset all state
    Keyboard.releaseAll();
    Mouse.release(MOUSE_LEFT | MOUSE_RIGHT | MOUSE_MIDDLE);

    for (int i = 0; i < 256; i++) keyPressed[i] = false;
    memset(last_keys, 0, 6);
    last_modifiers = 0;

    target_keyboard_found = false;
    hid_control_cid = 0;
    hid_interrupt_cid = 0;
    pairingBlinks = 0;
    ledBlinking = false;

    // Restart from appropriate scan mode
    if (strcmp(SCAN_MODE, "BT_Classic") == 0) {
      connection_state = SCANNING_CLASSIC;
      Serial.println("Restarting BT Classic scan...");
      initAndScanClassic();
    } else if (strcmp(SCAN_MODE, "BLE") == 0) {
      connection_state = SCANNING_BLE;
      Serial.println("Restarting BLE scan...");
      initAndScanBLE();
    } else {
      connection_state = SCANNING_CLASSIC;
      Serial.println("Restarting unified scan...");
      initAndScanClassic();
    }
  }
}We start with three configuration options that you can modify:
#define DEBUG_MODE false   // Set to false to reduce serial output
#define BLINK_MODE true    // Set to false for solid LED (no keypress blinks)
#define SCAN_MODE "Both"   // Options: "BT_Classic", "BLE", "Both"
DEBUG_MODE: Controls how much information is printed to the serial monitor
BLINK_MODE: Enables brief LED blinks when keys are pressed
SCAN_MODE: Determines which Bluetooth protocols to scan for
The program includes both Bluetooth Classic (BTStack) and BLE libraries, along with USB HID libraries for keyboard and mouse output. A state machine tracks the current connection status:
typedef enum {
    INIT,
    SCANNING_CLASSIC,
    CLASSIC_CONNECTING,
    CLASSIC_CONNECTED,
    SCANNING_BLE,
    BLE_CONNECTED,
    BOTH_FAILED,
    DISCONNECTED
} connection_state_t;
This enum defines all possible states the bridge can be in, from initial startup through various scanning and connection phases.
The setup() function initializes all components:
Serial Communication: Starts the serial port for debugging output
LED Setup: Configures the built-in LED for status indication
USB HID: Initializes keyboard and mouse USB interfaces
Protocol Selection: Based on SCAN_MODE, starts scanning with either Classic, BLE, or both protocols
The function uses the configuration setting to determine which scanning approach to take, defaulting to Classic first when "Both" is selected.
Initialization initAndScanClassic()
This function sets up the BTStack components for Bluetooth Classic operation:
Initializes L2CAP (Logical Link Control and Adaptation Protocol)
Sets up security management and link policies
Configures the device as a master (initiator of connections)
Registers event handlers for connection management
Device Scanning scanForClassicDevices()
The scanning function searches for nearby Classic Bluetooth devices and analyzes their Class of Device (CoD) codes to identify HID keyboards:
uint8_t majorClass = (cod >> 8) & 0x1F;
uint8_t minorClass = (cod >> 2) & 0x3F;

if (majorClass == 5 && (minorClass & 0x10)) {  // HID Keyboard
    // Found a keyboard, start connection
}
The CoD parsing identifies devices by their major class (5 for HID devices) and minor class bits (0x10 for keyboards).
Connection Process startClassicConnection()
Classic HID requires two L2CAP channels:
Control Channel (PSM 0x11): For configuration and control messages
Interrupt Channel (PSM 0x13): For actual input data
The connection process creates these channels sequentially, first establishing control, then interrupt.
Event Handling classic_packet_handler()
This callback function processes all Bluetooth Classic events:
Connection Events: Handles successful channel creation and failures
Data Packets: Processes incoming HID reports from the keyboard/mouse
Disconnection Events: Cleans up when devices disconnect
Initialization initAndScanBLE()
BLE setup is simpler than Classic, using the BluetoothHIDMaster library:
keystream.begin();
setupBLECallbacks();
ble_hid.begin(true);
ble_hid.connectBLE();
The BLE approach is more passive - it starts listening and detects devices when they send their first keypress.
Callback Setup setupBLECallbacks()
BLE uses callback functions for different input types:
onMouseMove: Handles mouse movement and scroll wheel
onMouseButton: Processes mouse button presses and releases
onKeyDown/onKeyUp: Manage keyboard key events
Each callback immediately forwards the input to the appropriate USB HID interface.
The hidToUsbKey() function translates between HID usage codes and Arduino Keyboard library key codes:
uint8_t hidToUsbKey(uint8_t hidKey) {
    switch (hidKey) {
        case 0x04: return 'a';    // HID 'A' key
        case 0x05: return 'b';    // HID 'B' key
        // ... more mappings
        case 0x28: return KEY_RETURN;  // Enter key
        case 0xE0: return KEY_LEFT_CTRL;  // Left Control
    }
}
This mapping covers letters, numbers, symbols, function keys, arrow keys, and modifiers.
Classic HID Processing forwardClassicToUSB()
Classic HID sends complete keyboard state reports containing:
1 byte of modifier flags (Ctrl, Shift, Alt, GUI)
6 bytes for simultaneously pressed keys
The function compares the current report with the previous one to determine which keys were pressed or released, then updates the USB keyboard accordingly.
BLE Processing forwardBLEKeyToUSB()
BLE sends individual key press/release events, making processing simpler. The function maintains a keyPressed array to track current key states and avoid duplicate press/release commands.
The Pico's LED provides visual feedback about the bridge's current state:
Slow Blink (1 second): Scanning for devices
Fast Blink (250ms): Classic device found, press a key to connect
Celebration Blinks: Multiple quick blinks when connection succeeds
Solid On: Connected and ready
Very Slow Pulse (2 seconds): Connection failed or disconnected
Brief Off Flashes: Key/mouse activity (when BLINK_MODE enabled)
Prevents the bridge from getting stuck in scanning states by implementing timeouts:
Classic scan: 10 seconds
BLE scan: 15 seconds
Failed state: 5 seconds before retry
When timeouts occur, the function either retries the same method or falls back to the alternative protocol.
Pressing the BOOTSEL button triggers a complete restart:
Disconnects from current devices
Releases all pressed keys
Clears pairing information
Resets all state variables
Restarts the scanning process
This provides a hardware-based recovery method when connections become problematic.
Here's how the code implements error handling:
Connection Failures: Automatically tries the other protocol
Timeouts: Prevents infinite waiting states
Invalid Data: Bounds checking on all array accesses
State Corruption: BOOTSEL button provides hardware reset
The fallback mechanism ensures that if one Bluetooth protocol fails, the other is automatically attempted, maximizing compatibility with different devices.
The code uses several optimization techniques:
Static Arrays: Pre-allocated arrays avoid dynamic memory allocation
State Caching: Previous key states are cached to minimize USB traffic
Bounds Checking: All array accesses are validated
Selective Debug Output: DEBUG_MODE reduces serial overhead in production
This design ensures reliable operation even with the memory constraints of the microcontroller.
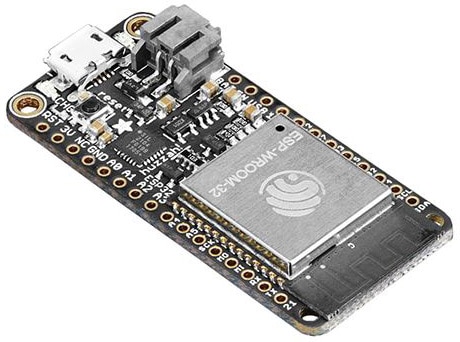
The Earle Philhower Arduino core makes it easy to use Arduino with all your favorite RP2040 boards so you can create fast projects using them.
You can find the documentation for the Earle Philhower Arduino core at https://arduino-pico.readthedocs.io/en/latest/
The first step to getting the Earle Philhower core to run on your RP2040 device is to install it.
First, open the Arduino IDE.
Then, navigate to File -> Preferences and paste the link below into Additional Board Manager URLs. If the field is initially blank, just paste the link in and press OK. If there are already one or more URLs there, add a comma to the last one and paste the link there and press OK.
The link to copy and paste:
https://github.com/earlephilhower/arduino-pico/releases/download/global/package_rp2040_index.json
Click “OK” to save these preferences. Then, go to Tools -> Board -> Board Manager and type pico into the search bar, and hit enter. Select Raspberry Pi Pico/RP2040 by Earle F. Philhower, III and press Install. Then press close and you should be all set to connect your RP2040.
Now that you've successfully installed the core, you can move on to connecting your RP2040 to the Arduino IDE.
To connect your RP2040 microcontroller-based board, connect it to your computer via a known good USB power+data cable. Hold down the BOOTSEL button when you're plugging it in to enter the bootloader. It should then show up as a USB drive with the name RPI-RP2 (or something similar) in your computer File Explorer / Finder (depends on operating system).
You only need manually to enter the bootloader the first time you load an Arduino sketch onto your Pico. It is not necessary to manually enter the bootloader to load subsequent sketches once you are already running an Arduino sketch.
Then in the Arduino IDE, go to Tools -> Board -> Raspberry Pi RP2040 Boards and select the board you are using.
Now, you're going to want to select the correct port to use. Open Tools -> Port and select the right port. On my computer, it was /dev/ttyS0. If it only gives you the options to use a port with ACM (Linux) in it, as in /dev/ttyACM0 or usbmodem (Mac/OSX), as in /dev/tty.usbmodem14301 then try unplugging it and plugging it back in, making sure to hold down the BOOTSEL button as you do so. On Windows, serial ports show up as COM ports.
Note that after you flash your first sketch, the board will not show up as a USB drive and will use ports such as /dev/ttyACM0, COM, or /dev/tty.usbmodem14301. Make sure to change the port in Tools -> Port.
Finally, to test that everything works, you can upload an example sketch that will make the onboard LED fade in and out.
Now that you've installed everything and connected your RP2040, it's time to flash a sketch to your board.
Make sure all your Arduino settings are correct, and you've selected the correct serial port.
In the Arduino IDE, navigate to File -> Examples -> Examples for Raspberry Pi Pico and select the Fade example. Then press the upload button and your code should start running in a few seconds.
If it worked, your RP2040 should look something like this.
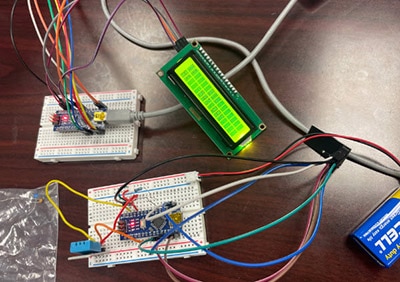
The Pico Bluetooth Keyboard Bridge is designed to search for a Bluetooth Classic keyboard to connect to first, then search for a BLE keyboard. If no connection is made, it repeats this cycle.
To use it:
Plug it into the target computer (or microcontroller with USB HID keyboard host) and put the keyboard into pairing mode
The Pico's LED will blink slowly while it scans for a device
LED blinks rapidly when a device is found
Press a key on your keyboard to connect
LED turns on stead solid while connected
LED blinks once per keypress while in use
To re-scan for a different keyboard, press the Pico's BOOT button
Watch the demo video below to see it in action!
You can 3D print a simple case for your Pico W or Pico 2W using the model files linked below. This design was derrived from the excellent Ruiz Bros. Snap-on Enclosure for Pi Pico you can purchase here.